3D
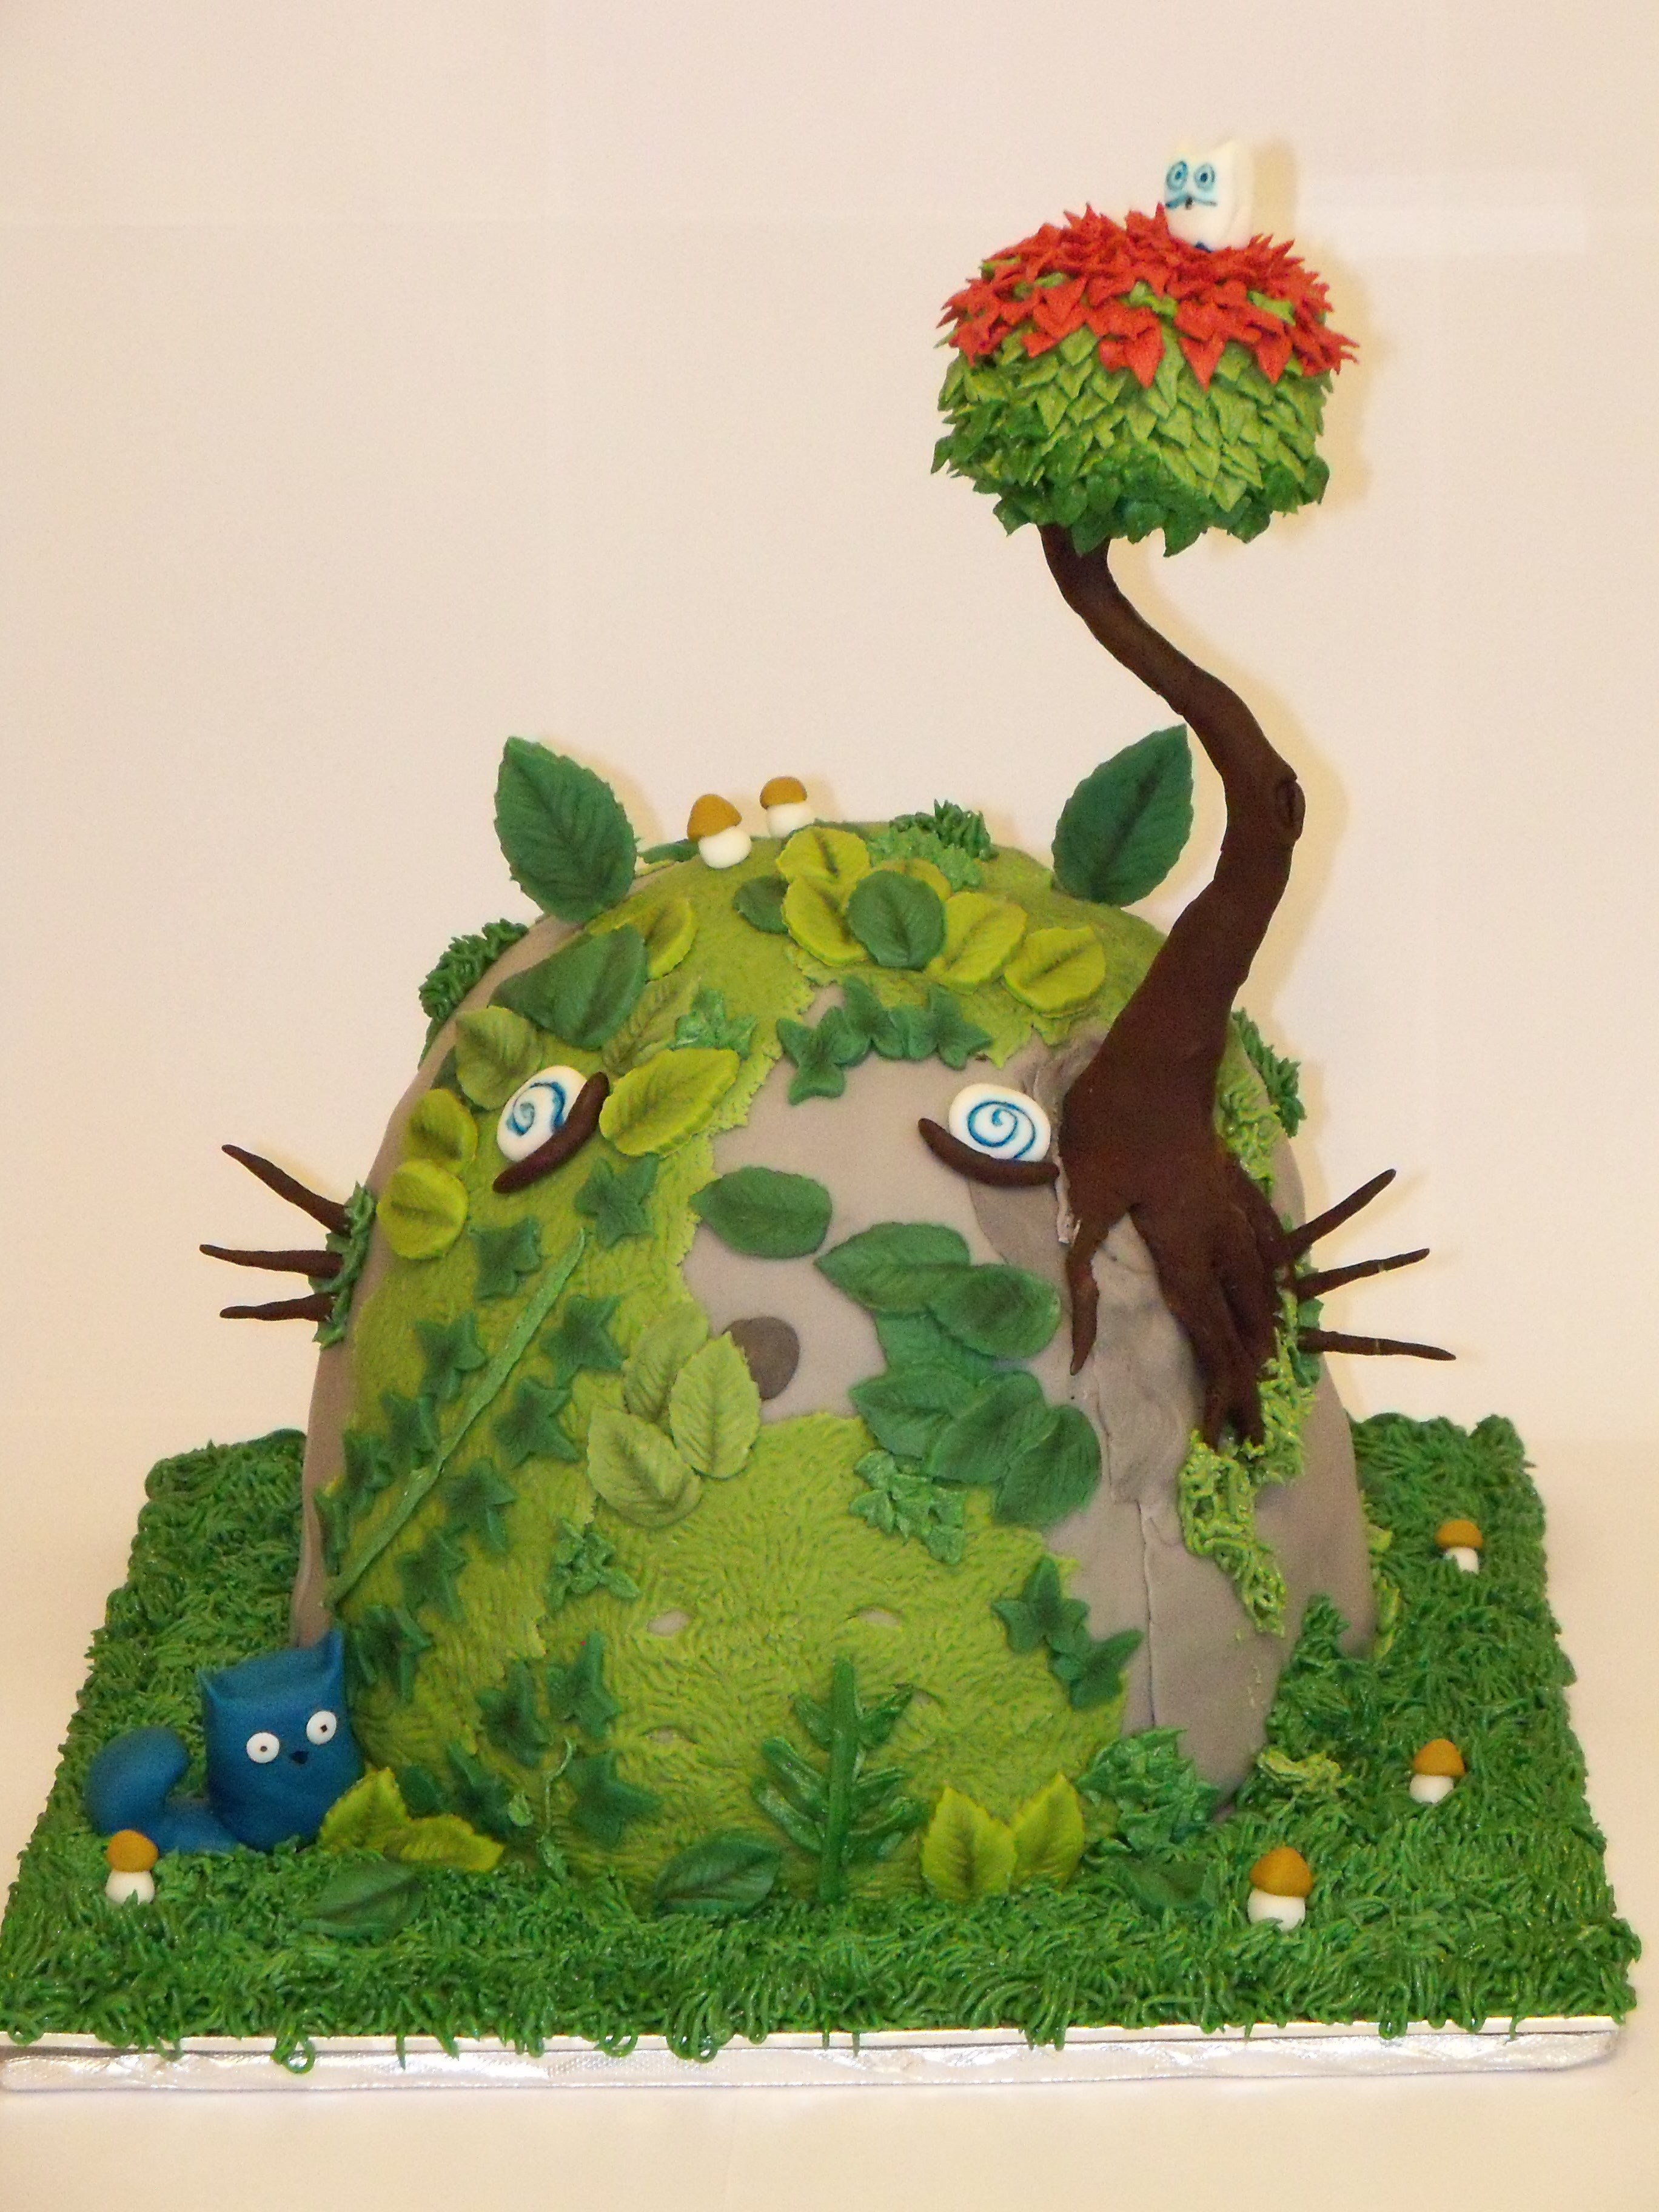
The Friendly Spirit
by Lucy Atkinson · submitted Aug 15, 2011 · 2011 contest
1 / 52
Description
Looking through the designs, I knew pretty much immediately that this was the one I wanted to make. That didn't make the process any easier though...
Sometime in the distant past (last week) I began by making one vanilla sponge 8" round, one chocolate 8" round, and one vanilla sponge 7" round. I split each round to have six layers, and froze them. I made a lot (and I mean A LOT) of swiss meringue buttercream, and once the cakes were slightly thawed I stacked and chilled them. This in itself was a mission, as you can't get the shelves out of my fridge (this was a tall cake!) without having to move the fridge, but that's a whole other story.
After chilling overnight, I began to carve and shape the cake into a rounder, 'stonier' shape. I mixed a load of the cake crumbs with some buttercream and piled the mixture on top for extra height and shape. I then began crumb coated the whole cake, smoothed, and set aside.
I coloured some fondant grey, and covered the cake. I deliberately didn't mix the colour completely or try to cover the cake too neatly, because after all it's meant to be stone - too neat wouldn't look right. Which was a good thing really, because I have no idea how I'd have found the space to roll out a single sheet of fondant big enough to cover the whole thing! I then coloured some more fondant green, rolled it out and tore it into the shapes I wanted to create moss. I applied it to the cake, and then textured it to make it look more 'mossy'. I cut out a couple of leaves for the 'ears' out of darker green fondant, and put them aside to dry. I then put the cake into the fridge overnight, as my kitchen had gotten so warm that the buttercream was threatening to melt entirely...
The next morning I got the cake out and, while I was waiting for it to come up to room temperature, measured, cut and shaped the support structure for the tree. I used an old wire coathanger (clean!) and cut a piece of cardboard for the platform at the top. I taped it into place, and covered the whole top with kitchen foil to make it foodsafe. At this point the cake was still sticky from condensation, so I decided to get on and mix all the buttercream colours I would need later. However, when that was done the cake was STILL sticky - and not even just tacky, the whole back felt slimy! Fortunately a friend advised me that putting it in front of a fan might help. Which is why, for an hour or two, my floor fan was perched precariously on my kitchen counter. Fortunately it worked!
I made some moss for the back of the cake, then set to work on the tree. I carefully put the support in place, and used modelling chocolate to model the trunk and roots. I coloured a load of fondant and began making the detail - leaves, snails etc. - for the cake, stuck some straight on and allowed others to dry. When all these pieces were on the cake, I turned my attention to the tree.
I then put a cupcake (one from the stash in my freezer - never know when you might need a cupcake) onto the platform, stuck it down with a little buttercream, and covered with green fondant. I then piped leaves onto it, and stuck the little guy on top.
This was when disaster struck. I left my (seemingly fine) cake to go and eat dinner with my boyfriend in the other room. Half an hour later he went back into the kitchen and suddenly called "Errr... your tree's broken. Thought you might want to know." Running back in, I found that the weight at the top had caused the tree to swivel, breaking part of the trunk. It was hanging precariously but - magically - the foliage was intact. I carefully pulled the whole tree and support structure off the cake, and set it in a nearby bottle to keep safe overnight.
The next morning, I pieced the tree back together and reinforced it with more modelling chocolate. I put it aside so the chocolate could set, and turned my attention to the final bits of detail. I dusted the leaves with green petal dust to give them some dimention, and piped buttercream grass around the board and onto the cake. I fixed the hole left by the tree, and moved the cake to the photo area. I took a few test shots and then - with my boyfriend on hand to catch it if it went horribly wrong - I finally put the tree back onto the cake. Miraculously, it stayed! Or, at least, it stayed long enough to finish taking photos, which was good enough for me.
Now I just need to find people to help me eat all this cake... shouldn't be too hard, right?