3D
FRANKIE GOES TO HOLLYWOOD
by Erin Drew · submitted Oct 27, 2014 · 2014 contest
1 / 16
Description
A friend told me about the Threadcakes contest and suggested that I enter. While I was browsing the t-shirt designs, Frankie Goes To Hollywood immediately stood out to me. I knew that it would involve a few techniques that I had little or no experience with, and I was excited for the challenge.
I began by baking a 9x13” and two 6” round pound cakes. After they cooled, I leveled off the tops and let them rest overnight. I also made a few batches of almond buttercream icing before calling it a night. The next morning I started by stacking my cakes- I cut the 9x13” in half to get the height that I needed for the shoulders. After stacking I let the cakes hang out in the fridge for a while to prepare for carving.
First i carved the shoulders- basically rounding things off a bit. Then I covered with a layer of buttercream and topped that with white fondant. I chose to airbrush the jacket so it it would have a shiny finish. To create the collar, I mixed a 50/50 blend fondant and gum paste and rolled it thin to cut out my shape. After that dried on the mat for a few minutes i glued it into place with gum paste dissolved in water and supported the collar with rolled paper towels until the shape dried. Then I airbrushed the entire thing with black airbrush color.
Up until now, this had all been familiar to me, but moving onto the head was a daunting task. I started by carving the cake base for Frankie’s head out of the 6” rounds. I carved the cake upside down so that it would be as stable as possible. After carving, I applied a layer of ganache over the cake to prepare for the next step.
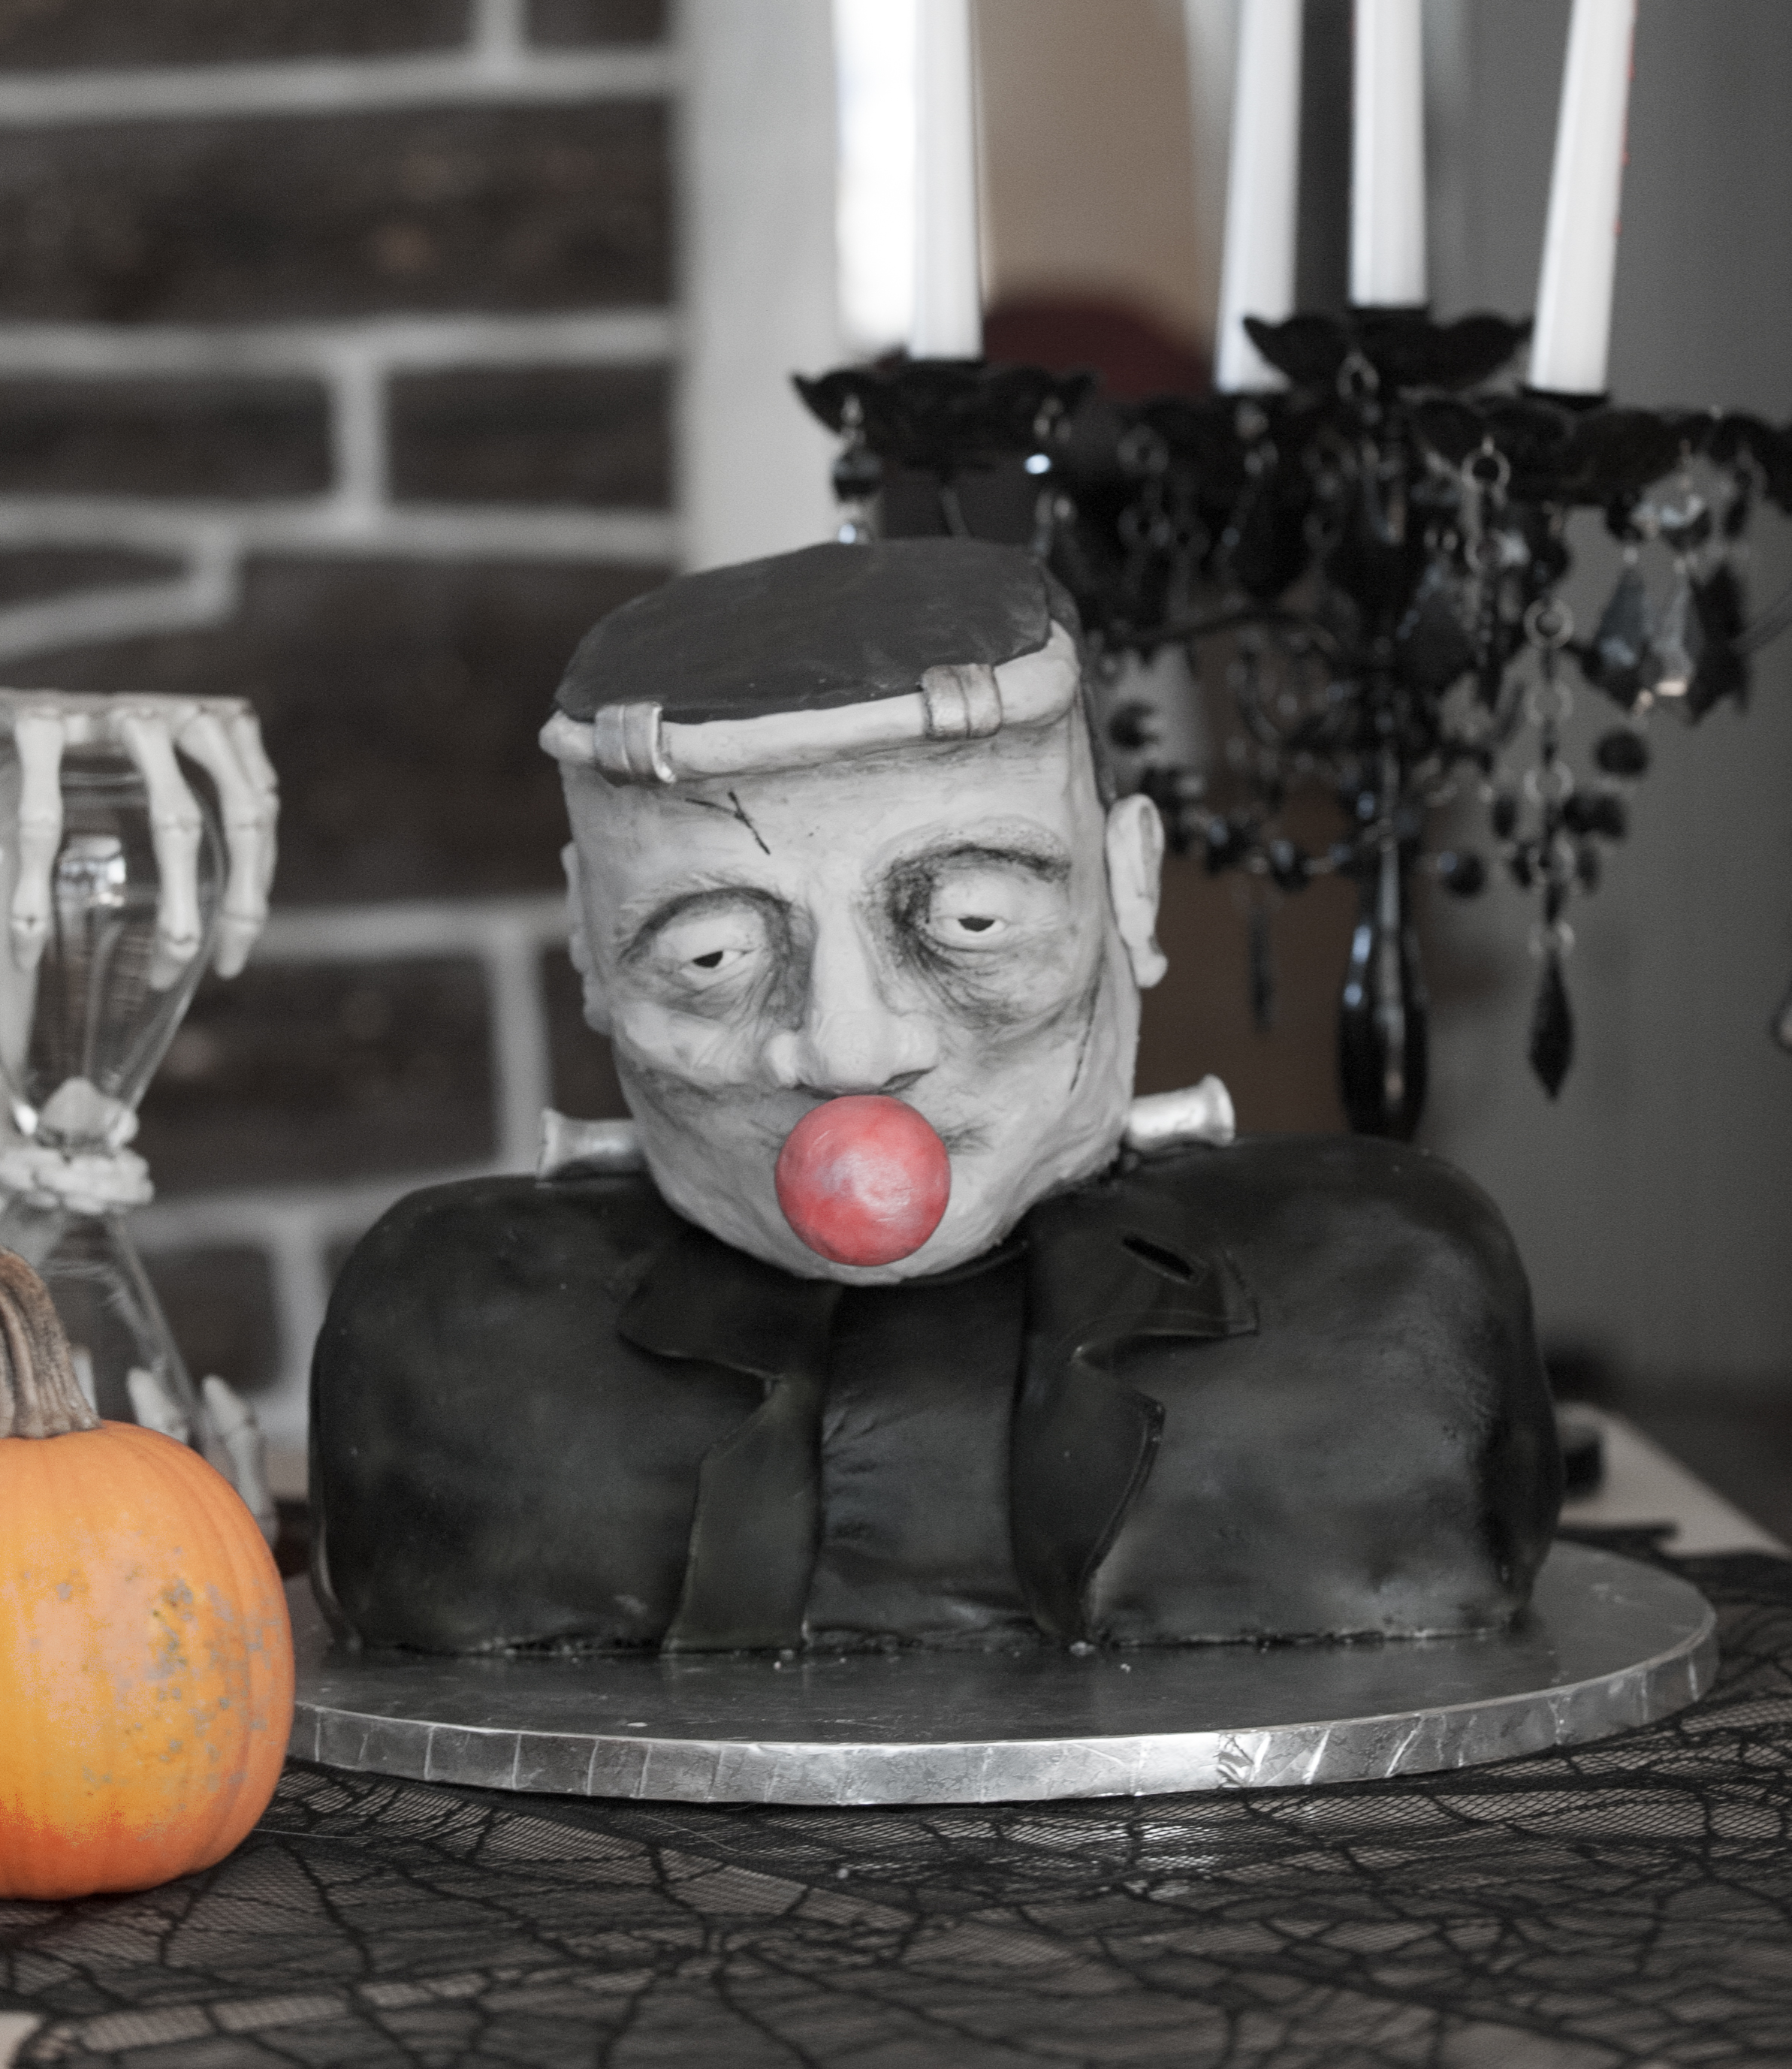
To support the weight of the head, I added 6 short dowels to the bottom layer of cake. After positioning the head I inserted a sharpened dowel through the entire cake and into the base. Now here was just the small matter of the face! I covered the entire head with a layer of grey modeling chocolate that I made from candy melts and corn syrup. After the entire surface was covered, I used a hair dryer to gently melt the modeling chocolate to smooth (but not too much! Frankenstein should have a few lumps and bumps.) To create the face, I added pieces of modeling chocolate that I had softened in my hands and then moulded. The eyes are balls of gum paste with pupils painted on with gel food coloring before shaping eyelids out of modeling chocolate. When I was satisfied with the shape and proportion of the face I used a veining tool to create texture in the eyebrows, wrinkles around the eyes and mouth, and a few scars. Lastly, I created shading with the airbrush.
The only things that were left were the details. I added hair using black fondant and the staples with white fondant and silver food air brush. The bolts were created from gum paste and made silver with the airbrush. They were applied with a thin coat of piping gel to act as a glue. I also made the bubble he is blowing out of gum paste and painted it pink. After that dried I highlighted it with silver. The bubble was attached with two toothpicks and some piping gel. Until the gel dried, I used a coffee mug to support its weight.
The cake was a big hit at a Halloween party and was enjoyed by all. Thank you for the chance to enter this contest with other talented bakers!
I began by baking a 9x13” and two 6” round pound cakes. After they cooled, I leveled off the tops and let them rest overnight. I also made a few batches of almond buttercream icing before calling it a night. The next morning I started by stacking my cakes- I cut the 9x13” in half to get the height that I needed for the shoulders. After stacking I let the cakes hang out in the fridge for a while to prepare for carving.
First i carved the shoulders- basically rounding things off a bit. Then I covered with a layer of buttercream and topped that with white fondant. I chose to airbrush the jacket so it it would have a shiny finish. To create the collar, I mixed a 50/50 blend fondant and gum paste and rolled it thin to cut out my shape. After that dried on the mat for a few minutes i glued it into place with gum paste dissolved in water and supported the collar with rolled paper towels until the shape dried. Then I airbrushed the entire thing with black airbrush color.
Up until now, this had all been familiar to me, but moving onto the head was a daunting task. I started by carving the cake base for Frankie’s head out of the 6” rounds. I carved the cake upside down so that it would be as stable as possible. After carving, I applied a layer of ganache over the cake to prepare for the next step.
To support the weight of the head, I added 6 short dowels to the bottom layer of cake. After positioning the head I inserted a sharpened dowel through the entire cake and into the base. Now here was just the small matter of the face! I covered the entire head with a layer of grey modeling chocolate that I made from candy melts and corn syrup. After the entire surface was covered, I used a hair dryer to gently melt the modeling chocolate to smooth (but not too much! Frankenstein should have a few lumps and bumps.) To create the face, I added pieces of modeling chocolate that I had softened in my hands and then moulded. The eyes are balls of gum paste with pupils painted on with gel food coloring before shaping eyelids out of modeling chocolate. When I was satisfied with the shape and proportion of the face I used a veining tool to create texture in the eyebrows, wrinkles around the eyes and mouth, and a few scars. Lastly, I created shading with the airbrush.
The only things that were left were the details. I added hair using black fondant and the staples with white fondant and silver food air brush. The bolts were created from gum paste and made silver with the airbrush. They were applied with a thin coat of piping gel to act as a glue. I also made the bubble he is blowing out of gum paste and painted it pink. After that dried I highlighted it with silver. The bubble was attached with two toothpicks and some piping gel. Until the gel dried, I used a coffee mug to support its weight.
The cake was a big hit at a Halloween party and was enjoyed by all. Thank you for the chance to enter this contest with other talented bakers!