3D
The Cheshire
by Amy Hart @The Mad Hattress · submitted Aug 17, 2010 · 2010 contest
1 / 79
Description
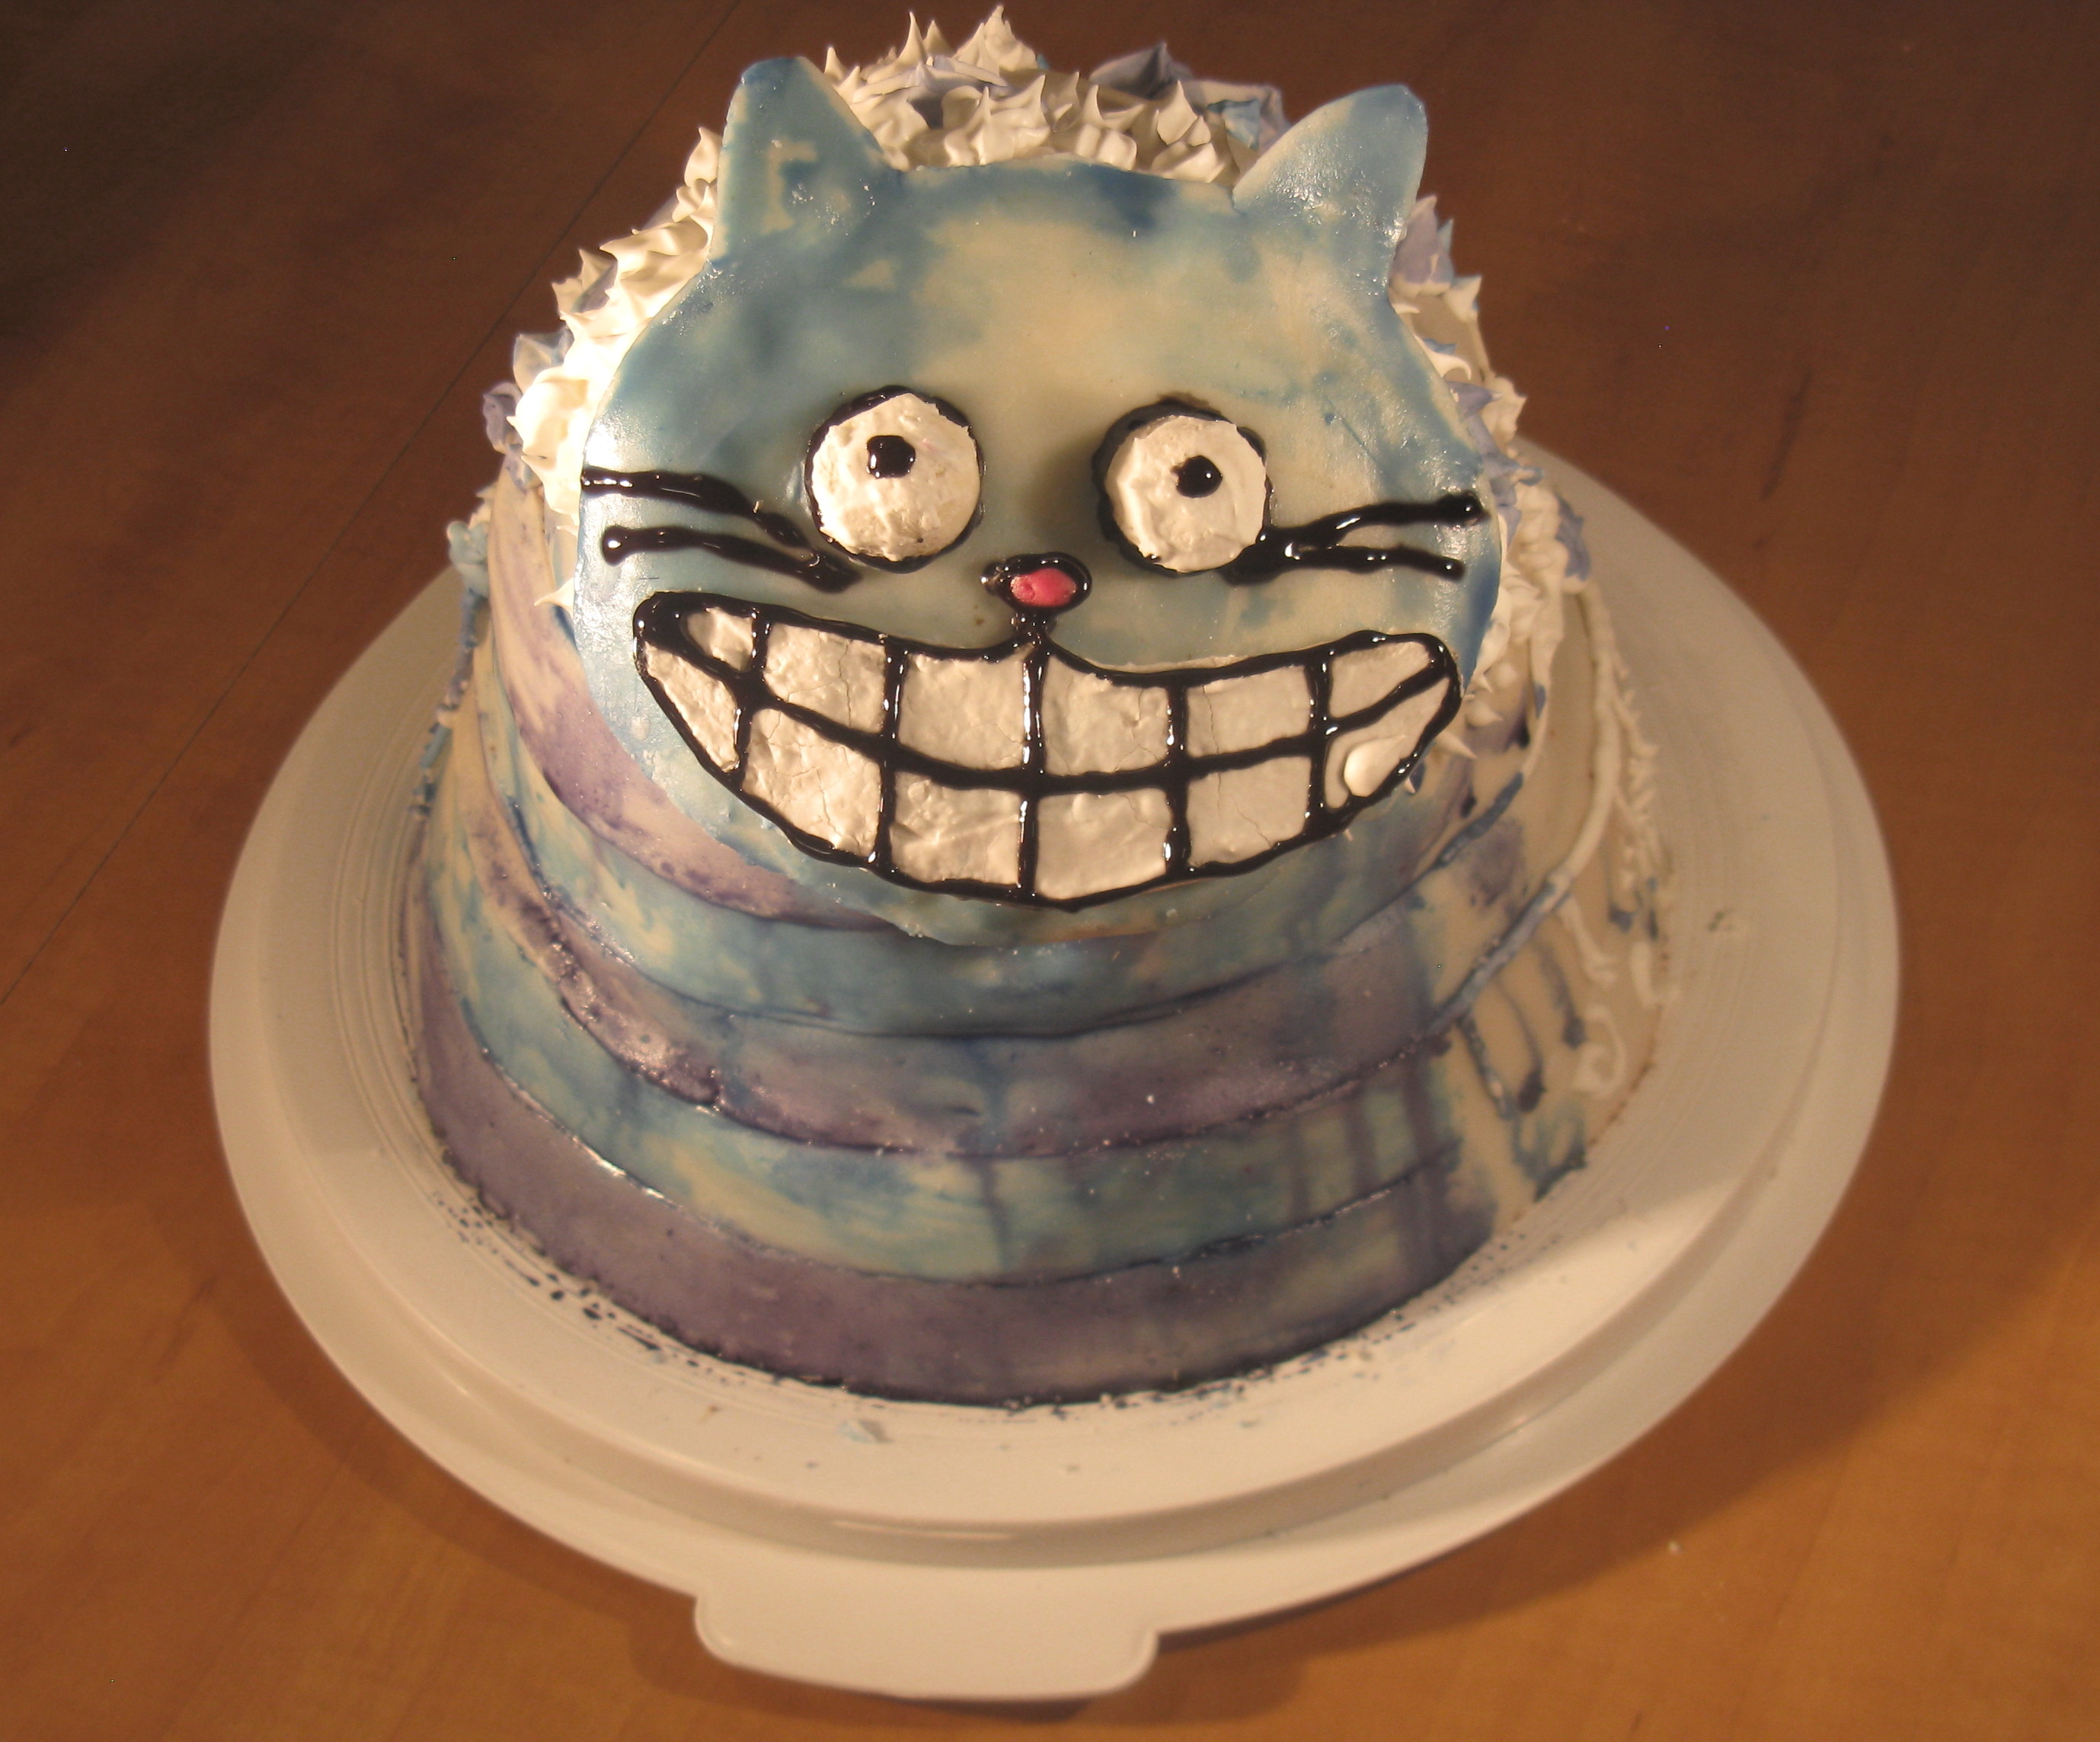
When I heard about the Threadcakes contest, I figured it was a good opportunity to overlap two of my loves: Threadless designs and cake. There are a lot of shirt designs that I really like (I think I own 6 tees and hoodies by now), but the one that stuck out for me as a cake was The Cheshire. It's a really cute interpretation of one of my favourite Alice in Wonderland characters. There's a lot going on in the original tee, but I liked that the cat fades away in different lighting. I figured the cake form of a Cheshire cat would involve it fading into an ordinary wedding cake. I envisioned it as a layer cake for a body with a flat face somehow attached.
This cake has been my life for the past weekend. The total time it took to make this baby was probably somewhere between 20-25 hours. I ended up using all new recipes, trying methods I wasn't used to, and making decisions as I went along; consequently, I made a lot of mistakes and became pretty frustrated at different times. But I stuck with it, and I'm glad that I did because I think I ended up with a pretty decent cake. The whole thing was made from scratch (well, minus the black icing gel) and is entirely edible (other than the four skewers holding Cheshire's face).
On Friday night I made up my cakes. I chose recipes for a chocolate fudge cake and a vanilla pound cake, hoping they'd be sturdy enough to pile on fondant and icing. For my Cheshire's face and features I also made up a recipe called edible cookie sculpture dough, which sounded like a cookie that would hold its shape well. Unfortunately, the dough was very dry, and the resulting cookies were less tasty than my ordinary sugar cookie recipe. At least they were pretty solid. I wasn't sure what size face would work best, so I cut out different size circles with round objects I had around and features to correspond with each one.
Saturday afternoon I started working on my fondant. I have never made or even tasted fondant before, but I had heard marshmallow fondant is easy to work with. At first I found it difficult to mix and knead, so I called in my mom, whose kneading skills far exceed my own. Together we eventually managed to get it pretty smooth. Later I made up my icings, also from scratch, making both a chocolate and vanilla buttercream. I started layering my cake and icing. The chocolate cakes were very crumbly which meant the buttercream wouldn't stick, but I struggled on and managed to make a reasonably smooth form.
I had planned on putting my fondant on from the top and smoothing it down. Since I was a fondant newbie, I didn't realize this would be really difficult to do. The fondant cracked both times as I tried to lay it out before I realized I had to come up with a back up plan. I decided to put on vertical stripes to match the pattern of the Cheshire. Luckily the fondant stuck this time with just a few cracks. It was less clean than I had hoped, but it worked. I also put fondant on the cookie face I thought fit the body best.
On Sunday I began decorating my cake. I made up some more frosting, royal icing this time. I piped patterns inspired by wedding cakes on to the back, trying to cover the seams of fondant and any cracks. I then mixed food colouring with almond extract to paint on the Cheshire's stripes and face. I tried to copy the pattern exactly as it appeared on the shirt, but painting on a nearly vertical made the colours drip a bit. Unfortunately, as I discovered after I started painting, my almond extract wasn't made with alcohol, so the paint never really dried, but it did make a nice watercolour effect. In order to tie in the colours of the Cheshire with the wedding cake, I painted some of the flowers with the same food colouring. To make the change between cat and cake more gradual, on the right side I copied and repeated the pattern of the piped icing with the paint, and on the left I used watered down colours and painted over some of the icing. I covered the Cheshire's eyes and mouth with royal icing, dipped the nose in red food colouring, then outlined the features with black gel icing I had bought (only because it's a pain to try to dye icing to black). Since it was late at night when I finished the details and I wanted my whole family to see the finished cake, but I wasn't sure how stable the face would be, I decided to hold off the final construction until the next day.
I had planned to attach the face with more royal icing. I also piped a few more flowers on the back of the cat's face to cover up the cookie back. I realized getting the face to stay vertical would be difficult, but I figured since royal icing magically keeps gingerbread houses together it could hold up Cheshire's face. Unfortunately, if the icing was going to hold up the cookie, it would take too long for the icing to dry in place. I tried holding it up, then drying the icing with a hair dryer, but the cookie kept sliding down. I put in four skewers just to keep the face in place as it dried, but since time was running out I ended up leaving them in while I took the pictures. The skewers have since been taken out, and the face is holding up okay.
I've never attempted to decorate a cake to this extent before, and I've found I have even more respect now for people who do this for a living (and also those who do it for fun for the Threadcakes contest). It was a lot of work and a lot of struggling as I tried to figure out how to fix my many problems. But I'm pretty happy with the completed cake. Probably even more importantly, I was happy with how it tasted. Mmm cake.
(Thanks should go out to my mom, who kneaded and rolled fondant, made up my second batch of royal icing, and put my millions of dishes in the dishwasher for me; my dad, who went out and bought me 6 kg of icing sugar, black gel, and paint brushes over multiple trips; and my brother, who kindly ate the scraps of cake and icing left over from my Cheshire. They were incredibly patient as I decorated my baby, even though they would have just as happily eaten the cakes straight from the pan.)