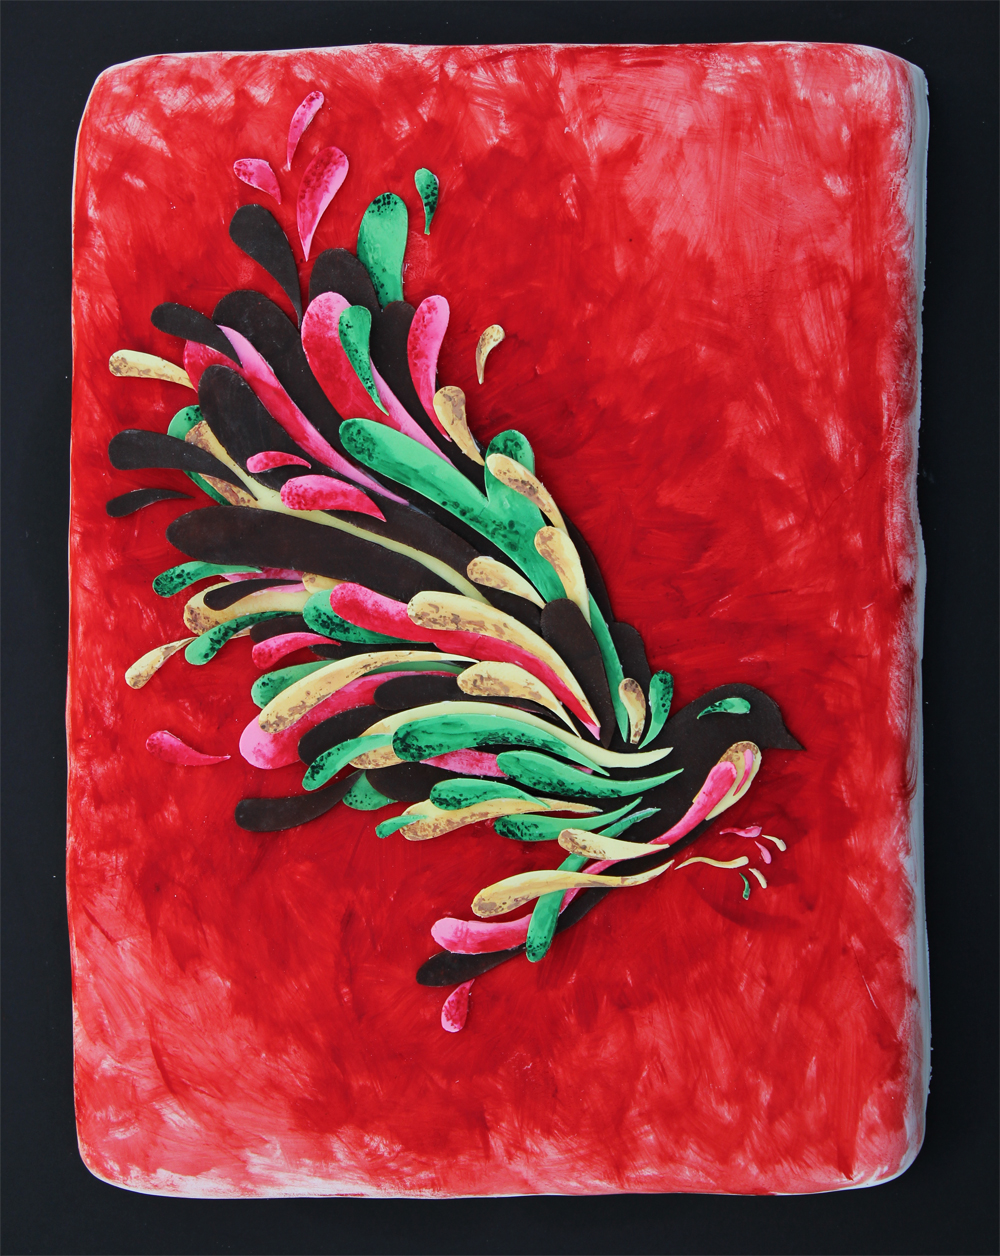
3D Finalist
Nature Photography
by Carly Geehr · submitted Jul 14, 2011 · 2011 contest

1 / 82
Description
The "Nature Photography" illustration is breathtaking - I debated a long time before committing to reproducing it in cake because I really didn't want to screw it up. The illustrator deserves all the credit for this creation - I just took his vision and made it edible :)
This cake's (epic) story is captured in the 200+ photos I took - but since there's no way I'm uploading all of them, I'll supplement the visuals with an outline of my process…
Day 0: "Technical drawings." (I *might* have a degree in mechanical engineering.)
Day 1: Made the rice krispie treat! One big one. I used a toilet paper roll (covered in plastic wrap!) cut in half to mold the edges of the camera body, smooshed the whole thing with Machinery's Handbook (sadly, all it's used for now that I'm no longer spending my days in the machine shop) and stuck it in the fridge to harden up. Later, I cut it to the right dimensions and covered it with gray gumpaste.
Day 2: The painting process begins… I used 4 different types of black "paint" - wilton cookie icing, black petal dust w/ lemon extract, food writer marker, and food coloring paste. I was glad to have all of them, because they were all good for different things! Aside from beginning to paint, I made/painted all the camera knobs and started molding the lens cylinders. I used a bottle of oyster sauce and a can of inari skins as molds. Diameter matters!!
Day 3: Glued the lens assembly together with massive amounts of royal icing - I was a little paranoid about it falling apart/warping. I did a lot more painting and kind of started getting the hang of when to use dry dust vs. a lemon extract paste. This was uncharted territory for me! I busted out the x-acto knife to do some carving on the lens and some areas that needed highlights.
Day 4: This was a big day. I built/painted the top part of the camera assembly and made all the leaves. The leaves were super fun! Tiny little guys, but so much detail. I was kind of glad there were only 9 of them! Some of them were easy to glue onto the camera body and others needed some help… I recruited all the random supplies I had lying around the table at this point to help prop things up at strange angles.
Day 5: I was unprepared for how difficult it is to work with tiny gumpaste vines! I have so much respect for people whose designs involve lots of 'em. Oof. The other big thing was that I started on the butterfly - I made it into 2 sections, just to give it a little depth. I cut both out of gumpaste and did the first layer of color (the red and yellow). This was by far my favorite part of the whole process - if you look at the illustration, there are photos inside many of the wing segments! I loved trying to reproduce those with the petal dust :)
Day 6: I finished up the butterfly with some black paint (the Wilton cookie icing) and then assembled it all - the scariest part by far was putting on the antennae and legs. They're so tiny, I was terrified they'd break. And they did. Twice. But that's why you keep extra gumpaste around! Ha.
Day 7: I took a day off. (This is of no religious significance.)
Day 8: Frantic baking. I covered a cutting board in fondant (as I learned with my last cake, gumpaste gets grease stains from buttercream icing. Go figure.) and baked up a flurry of peanut butter cakes! I made a pb&j cake tower and covered it with gray buttercream.
Day 9: Final frosting (some white frosting behind the butterfly and camera, like in the illustration background), assembly, and photos - thanks to my amazingly talented friend, I have decent photos of the final cake!
Day 10: Just happened to be my roommate's birthday! We celebrated by demonstrating my cake's edibility. It was mighty tasty indeed :)
Baker’s site: carlygeehr.com