2D
Conservation Status
by Tanya Austin · submitted Jul 24, 2009 · 2009 contest
1 / 20
Description
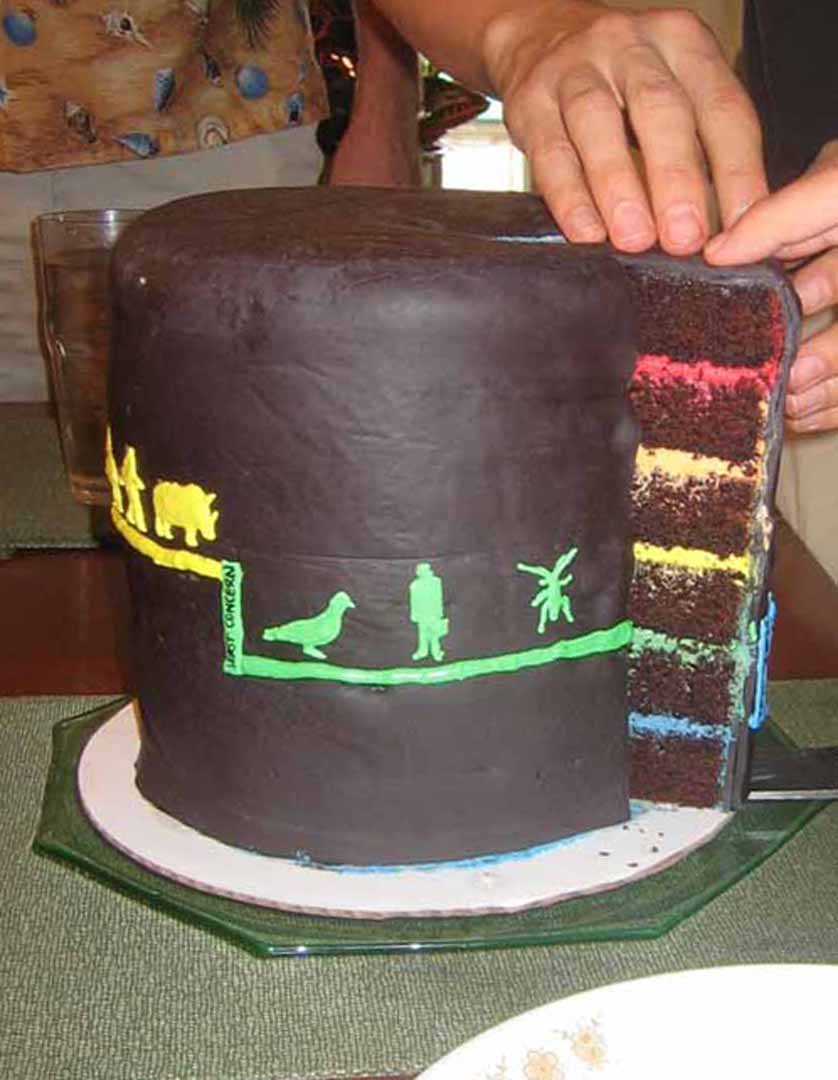
"Conservation Status" is such a striking cake that we didn't think the design should be limited to just the outside-- so we decorated the inside to match!
The cake is six 8" layers of chocolate cake, which are layered with colored frosting to match the horizontal lines in the original design. Then the whole cake was coated in tiers of the same colored frosting, so that each slice would mimic the vertical side-tabs as well as the horizontal lines. We tried our best to line up the outside colored details with the inside ones.
Then the whole cake was covered in black fondant. While that set up, we made royal icing in various colors to pipe the animal silhouettes. We'd printed out pictures of the shirt design and scaled them to the proper size, then covered them in wax paper so all we had to do was pipe the icing on top of the printout in the correct shape. Since we planned to stick them on the curved cake surface after they were dry, we let them set while taped to the outside of the curved cake pan.
One of the hardest parts was measuring the outside of the cake to figure out how to space the colored levels. We didn't want the cake to only have one "good" side, so we staggered the levels all around it. Then we piped the horizontal lines, and peeled the now-hardened animals off the wax paper to stick in the appropriate spots. We used food markers to write the "Extinct," "Resurrected," etc. labels on the vertical tabs.
When we sliced into the final (huge) cake (seven hours after we'd started), the inner colors really popped! The rainbow effect was really one of the coolest parts of the cake, though the animal silhouettes turned out pretty amazingly as well. And the cake itself? Let's just say that between the five of us, the six layers of cake went pretty fast!